macOS privileges on USB drive
Ever since I bought a MacMini 2014 I was dreaming of using it as NAS in my home network. It could potentially serve as well as GitHub.com or GitLab.com build agent or maybe as a TeamCity server, but basic things first.
What I needed at the beginning was more space! And I am not talking just about a bit of it, what I had in mind was a huge room to store my personal images, MP3s, yet eBooks and audioBooks collections or art assets purchased on HumbleBundle.com.
I took the whole device apart following this guide and introduced necessary changes. Beside the fact that I had to buy a dedicated TORX Security TR6 with a hole in the middle to be able to get into the device, the disassembling process was pretty straightforward.
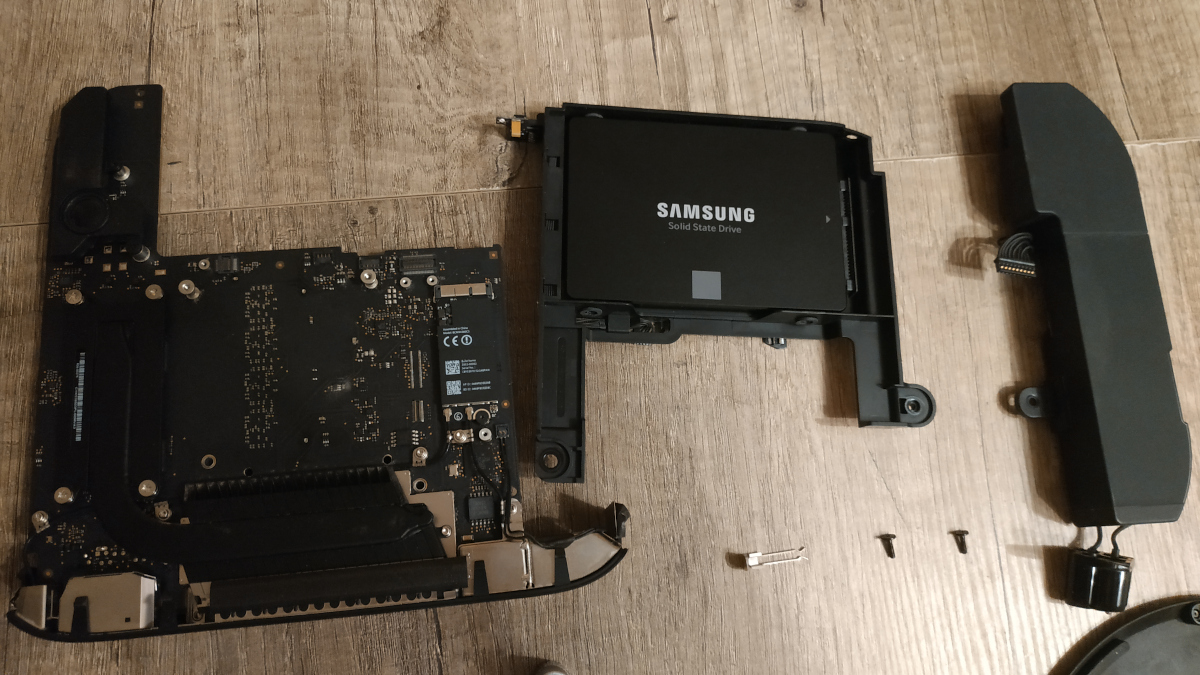
I unscrew original HDD and replace it with Samsung 1TB 860 EVO drive along with Adata XPG S11 Pro 512GB PCIex NVMe Gen. 3 x4 that was mounted instead of the non-existing in my case Fusion Drive. The latter disk worked through an NVMe adapter. The bigger problem was RAM, which is soldered into the board and couldn’t be extended this time, nor anytime in the future! It’s really bad…
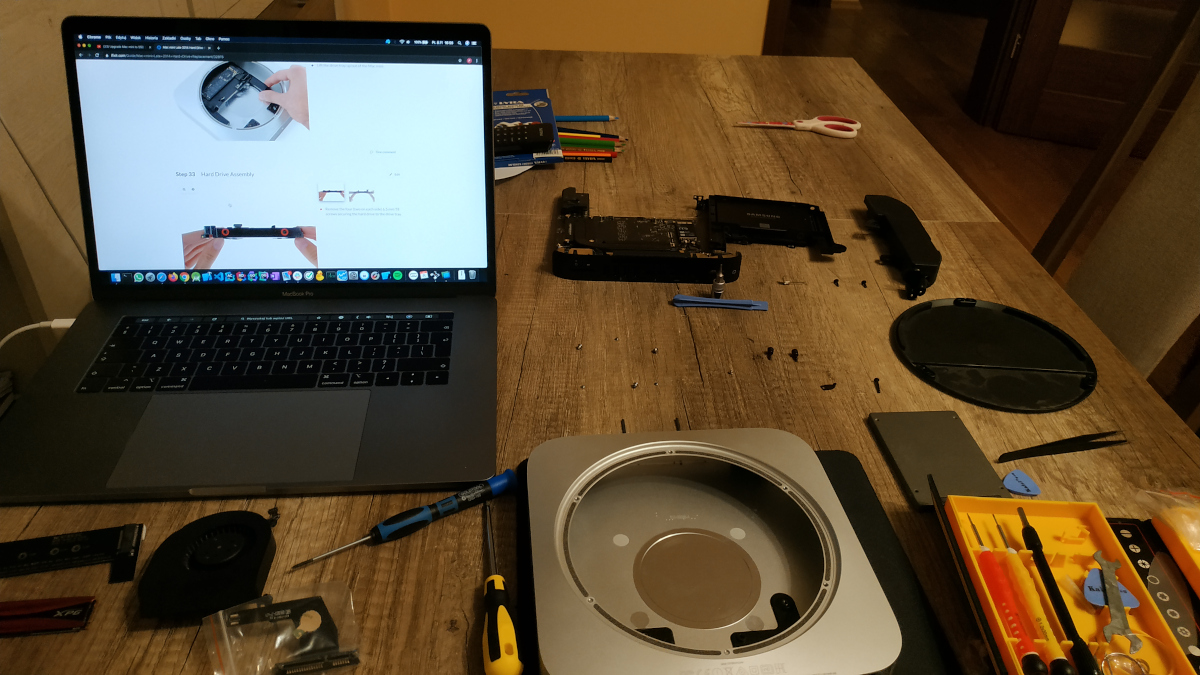
After assembling it back again, installing macOS was unsurprisingly pretty easy. Using the Recovery Mode, it’s possible to instruct MacMini to install latest compatible system version via network by just pressing Option-⌘-R at boot time. You can find more options on this Apple Support page.
External drives
That configuration stayed OK for few months before I got hungrier and asked for more space! There was no more connectors inside, but fortunately MacMini has 4 USB 3.0 ports. Using them I could build a nice Christmas tree out of the device just by attaching Unitek Y-3036 enclosures with some entry level big SSDs (like: Adata SU800).
However, one issue appeared immediately. By default no access rights were enforced for users of the attached drives. And since I didn’t want any users to be able to simply access and be able to modify any files on any of those volumes, I dig into the system and turn the proper function on. Let me then present it proudly:
First format attached disk as
APFSvolume usingDisk Utility.app. This will let you setup privileges for files and folders. Remember -FAT16, norFAT32can’t and it’s impossible to make them work!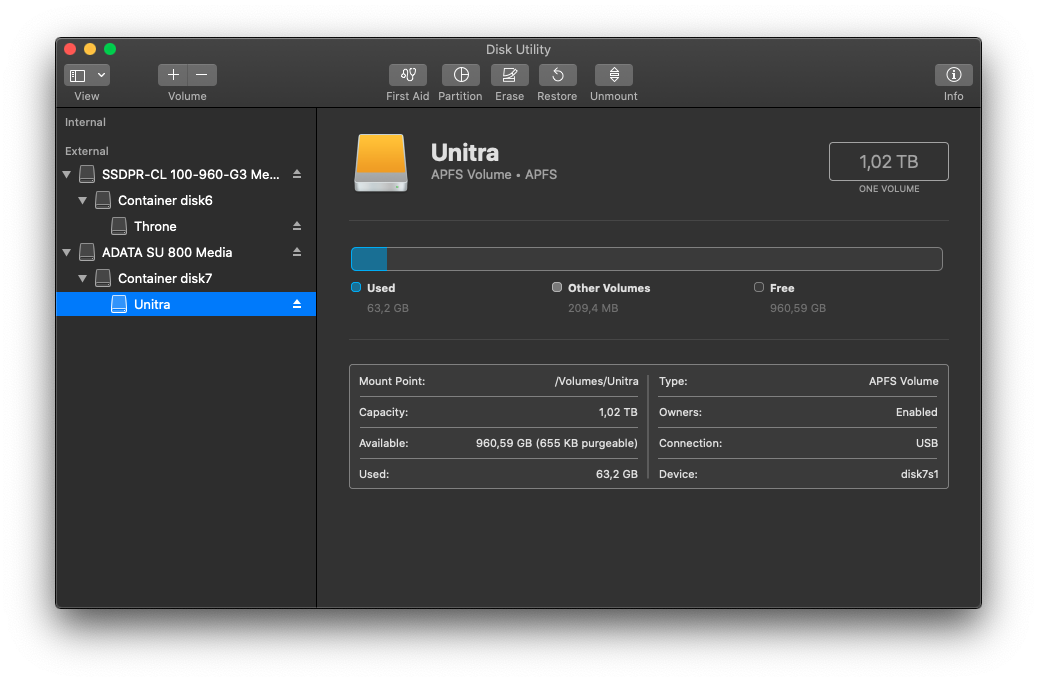
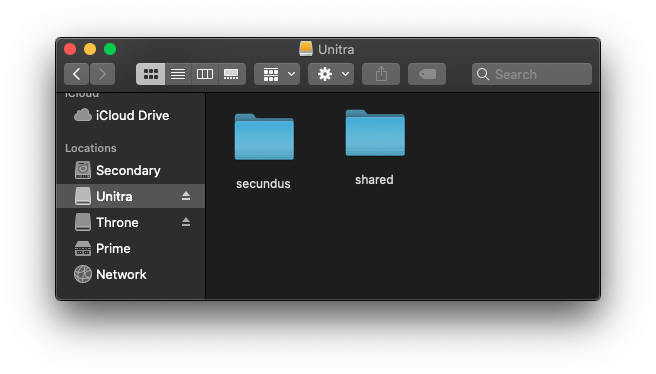
Navigate to volume info in
Finder. Here it is calledUnitra.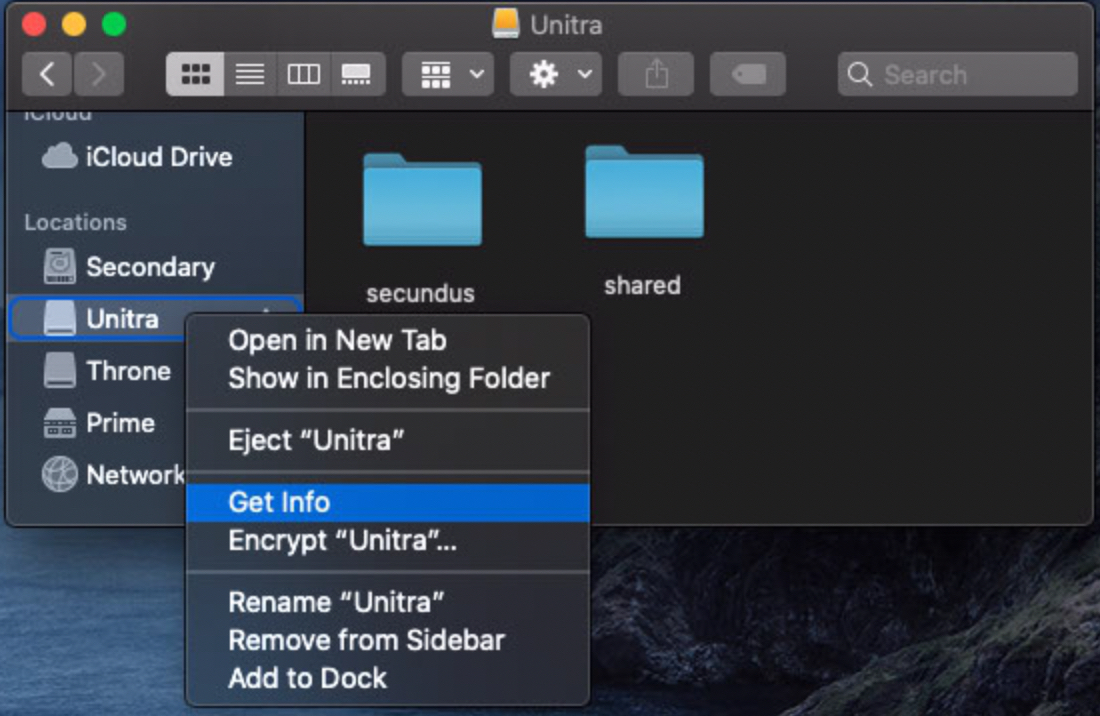
Remove check-mark from option
Ignore ownership on this volume. It’s located on the very bottom of the list of properties.
Now, create desired folders.
And finally through their info, use
Sharing & Permissionsproperties to assign particular users’ privileges to read or write there.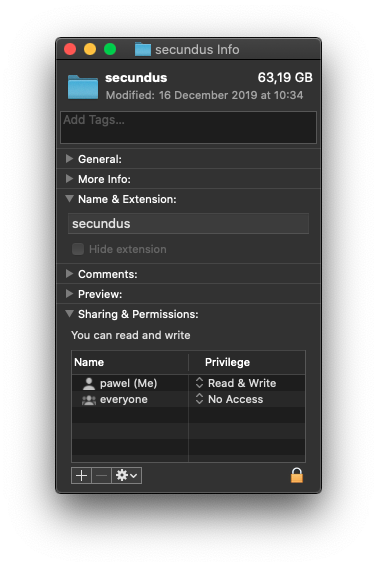
Done!
Post scriptum
MacMini Late 2014 has got very few GB of RAM to spent on everything. Unfortunately the model I bought had only 4GB of RAM, so making it a build server was a bit of an overkill. I haven’t even try to install TeamCity. With the latest Catalina OS, it already spent most of its time starving for free memory. Using VNC is OK, but switching user accounts sometimes counts in minutes. You can read other article about identical problems here. Still, I think it serves good as pure NAS. Network performance is more than good and SSD helps a lot in utilization of 1Gbit ethernet.
My advice would be here to look for something with much more memory, if you need more services running all the time.
THE END
UPDATED: 2020-10-16: I did migrated partially to recently bought Intel NUC i5-8259U - more here.